March 28th, 2007
Es ist also soweit: eine Windows-Benutzerin aus meinem Arbeitsumfeld ist bei mir angetanzt und wollte Vista durch XP ersetzt haben. Grund? Diverse Spiele – die ihr Freund zocken will – funktionieren nicht mehr. Und “es schaut alles so anders aus und nichts findet man mehr”. Ah, das ist also dieses WOW. OK, sollte ja nebenbei eigentlich ohne großen Aufwand machbar sein. Denkste. Einerseits ist das System immer wieder vor dem Login-Screen abgestürzt (einfach “unmotiviert” rebootet, ohne irgendwas im Syslog zu hinterlassen). Andererseits war es ums Biegen und Brechen nicht möglich, dem XP-System die verbaute Hardware beizubringen. Beispiel Netzwerk-Karte:
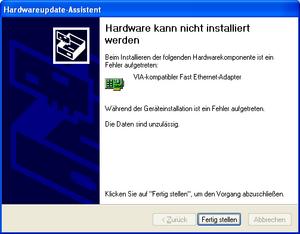
Na, dann probieren wir es halt nicht mit der OnBoard-Variante, sondern einer eigenen PCI-Netzwerk-Karte die ich noch rumliegen habe:
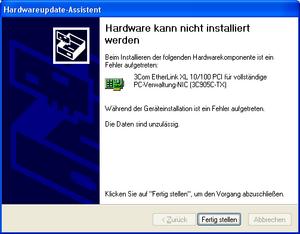
Juhu. Egal mit welcher Variante ich den Treiber installieren wollte, es kam immer nur diese Fehlermeldung und kein bisschen mehr. Lustig finde ich auch die sich wiederholenden Fragen zu ‘Möchten Sie eine Verbindung zu Windows-Online herstellen, wegen Treibersuche und blabla…’ obwohl noch rein gar nix an Netzwerk-Funktionalität im System war. Klar möchte ich…. Naja, irgendwann hab ich dann noch die Sound- & CO-Treiber für WinXP vom Hersteller gefunden. Der Via-Installer ist einer weiterer Hammer:
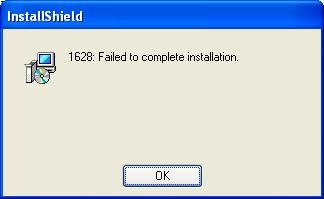
Nach ~4 Reboots und mehreren Install-/Deinstallationsorgien mit der manuellen Installationsvariante waren zwar die VIA-Treiber drauf, aber weder die Netzwerkkarte(n) noch die Soundkarte waren nutzbar. Aber zum Glück sind die Treiber ja zertifiziert!!!!1elf!
Fazit: auf das System wandert jetzt wohl erst wieder ein Vista drauf, mit dieser netten Recovery-DVD… Mit OpenOffice, weil das 2007-er Office (davon war eine Testversion bei diesem Komplettrechner mit dabei) ist halt auch wieder so anders als das bisher verwendete… Und JFTR, mit der 64Bit-Version von grml lief das System ohne Probleme. Weder mit den Netzwerkkarten noch mit Sound gabs Probleme… Aber Windows ist ja halt sooo einfach zu installieren….
Posted in Computer, Rants | 3 Comments »
March 23rd, 2007
Nein, es reicht ja nicht, dass einem die Platte stirbt. Man holt Ersatz in Form einer 120GB 2.5"-Festplatte, weil man damit auch genug Platz fürs Entwickeln hätte. Dann aber lässt mich OpenFirmware vom Efika-Board nicht von der Platte booten:
channel 0 unit 0 :   ata | SAMSUNG HM120JC                          | YL100-19
ATA device not present or not responding
[...]
ok devalias
Alias                 Device Path
--------------------------------------------------
ide                   /builtin@F0000000/ata@F0003A00/disk@0,0
hd                    /builtin@F0000000/ata@F0003A00/disk@0,0
eth                   /builtin/ethernet
ok ls hd
ATA device not present or not responding
ok ls hd:0
ATA device not present or not responding
ok
Ja, die “alte” 100GB-Platte bootet nach wie vor einwandfrei. Jetzt hab ich mein System halt als Würgaround via USB-Stick und d-i installiert und boote die Festplatten-Installation mühsam via USB-Stick. Die Festplatten-Installation? Ja, denn die Festplatte wird ja erkannt, nur kann ich davon nicht booten…. So ist das jetzt halt langsam, umständlich und nicht wartungsfreundlich. Murphy, ich hasse dich. Das ist ärgerlich. Einfach. Nur. Ärgerlich.
Posted in Computer, Hardware, Rants | Comments Off on Murphy!
March 22nd, 2007
Hardware-Probleme hat man genau dann, wenn man sie nicht brauchen kann:
[...]
Mar 21 20:22:48 grmlppc kernel: ata1.00: exception Emask 0x0 SAct 0x0 SErr 0x0 action 0x0
Mar 21 20:22:55 grmlppc kernel: ata1.00: tag 0 cmd 0x20 Emask 0x9 stat 0x51 err 0x40 (media error)
Mar 21 20:23:01 grmlppc kernel: ata1: EH complete
[...]

root@grmlppc ~ # smartctl -d ata -A /dev/sda
smartctl version 5.36 [powerpc-unknown-linux-gnu] Copyright (C) 2002-6 Bruce Allen
Home page is http://smartmontools.sourceforge.net/

=== START OF READ SMART DATA SECTION ===
SMART Attributes Data Structure revision number: 16
Vendor Specific SMART Attributes with Thresholds:
ID# ATTRIBUTE_NAME          FLAG     VALUE WORST THRESH TYPE      UPDATED  WHEN_FAILED RAW_VALUE
  1 Raw_Read_Error_Rate     0x000f   200   198   051    Pre-fail  Always       -       6
  3 Spin_Up_Time            0x0003   193   190   021    Pre-fail  Always       -       1333
  4 Start_Stop_Count        0x0032   100   100   000    Old_age   Always       -       22
  5 Reallocated_Sector_Ct   0x0033   200   200   140    Pre-fail  Always       -       0
  7 Seek_Error_Rate         0x000f   100   253   051    Pre-fail  Always       -       0
  9 Power_On_Hours          0x0032   100   100   000    Old_age   Always       -       14
 10 Spin_Retry_Count        0x0013   100   253   051    Pre-fail  Always       -       0
 11 Calibration_Retry_Count 0x0012   100   253   051    Old_age   Always       -       0
 12 Power_Cycle_Count       0x0032   100   100   000    Old_age   Always       -       22
192 Power-Off_Retract_Count 0x0032   200   200   000    Old_age   Always       -       21
193 Load_Cycle_Count        0x0032   200   200   000    Old_age   Always       -       397
194 Temperature_Celsius     0x0022   108   103   000    Old_age   Always       -       39
196 Reallocated_Event_Count 0x0032   200   200   000    Old_age   Always       -       0
197 Current_Pending_Sector  0x0012   200   200   000    Old_age   Always       -       2
198 Offline_Uncorrectable   0x0010   100   253   000    Old_age   Offline      -       0
199 UDMA_CRC_Error_Count    0x003e   200   200   000    Old_age   Always       -       0
200 Multi_Zone_Error_Rate   0x0009   100   253   051    Pre-fail  Offline      -       0
Dabei wollte ich gerade beim grml-ppc-Port weitermachen. :-( *seufz*
Posted in Computer, Hardware, Rants | Comments Off on Sterbende Festplatte….
March 20th, 2007
Der Installer von der Visual Studio 2005 Express Edition ist wirklich rocking (un)stable (reproduzierbar):
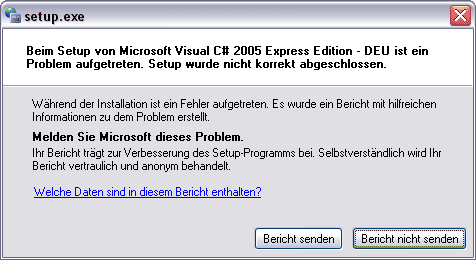
NOSSO von Solaris (‘highly compressed with the NOSSO(R) file optimization program‘) ist wirklich superschnell:
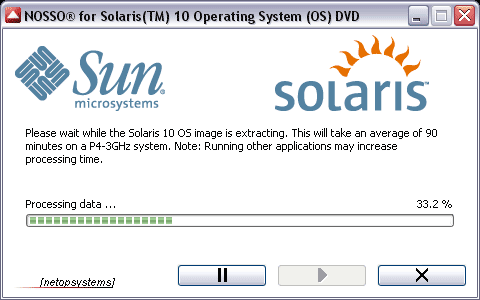
… nach knapp 2 Stunden bin ich ja immerhin schon bei 99,4%… das nächste Mal wähle ich wohl doch wieder die “all platforms”-Variante….
Posted in Computer, Rants | Comments Off on Grandiose Software
March 14th, 2007
Update on 2007-09-12: updated shell script and added Pre-Invoke to dpkg configuration.
Based on Bart Trojanowski’s blog article “etc snapshots with git” I removed one further item from my todo list: maintain /etc with mercurial on my Debian systems.
First step is creating the repository and securing access to the repository. As mercurial stores all its files within one single directory named .hg you won’t have any further directories within /etc besides /etc/.hg, rocking – right? ;-)
cd /etc
hg init
chmod og-rwx .hg
Ignore a few files:
cat > .hgignore << EOF
syntax: regexp
(^)*.dpkg-new
(^)*.dpkg-old
(^)blkid.tab(|.old)
(^)mtab
# add other files if necessary, depends on your setup...
EOF
Now commit the current state:
hg add
hg ci -m "initial checkin"
We want to commit the changes automatically when using apt-get/aptitude so let’s write and include a wrapper for it – /etc/apt/hg-snapshot-script:
#!/bin/sh
set -e

caller=$(ps axww | mawk '/aptitude|apt-get/ {for (i=5; i<=NF ; i++) printf ("%s ",$i); printf ("\\n") }' | head -1)

hg addremove 1>/dev/null
STATUS="$(hg st)"

if [ -z "$STATUS" ] ; then
   echo "hg-snapshot-script: nothing to be done"
else
   case "$1" in
        pre)
           echo "hg-snapshot-script: found changed files:"
           hg st
           hg ci -m "snapshot from $LOGNAME before: $caller"
          ;;
        post)
           echo "hg-snapshot-script: found changed files:"
           hg st
           hg ci -m "snapshot from $LOGNAME after: $caller"
          ;;
        *)
           echo "hg-snapshot-script: found changed files:"
           hg st
           hg ci -m "snapshot from $LOGNAME on $(date '+%Y-%m-%d - %H:%M:%S')"
          ;;
   esac
fi
Activate it:
chmod +x /etc/apt/hg-snapshot-script

cat >> /etc/apt/apt.conf << EOF
DPkg {
  Pre-Invoke  {"cd /etc ; ./apt/hg-snapshot-script pre";};
  Post-Invoke {"cd /etc ; ./apt/hg-snapshot-script post";};
}
EOF
Finally track the added files as well:
hg add
hg commit -m "apt will track /etc automagically using hg"
That’s it. :-)
Oh BTW: users of subversion might want to point their browser to /etc under svk (by Enrico Zini).
Posted in Computer, Debian, English | Comments Off on Maintain /etc with mercurial on Debian
March 10th, 2007

Ok, a little bit delayed due to busy days… – anyway. Last weekend Chemnitzer Linuxdays 2007 took place and as already written in the grml-develblog I’ve been there. As every year Chemnitzer Linuxdays were great. I really enjoyed meeting people, hacking and giving support at the grml-booth, though it was quite stressful for me overall. On saturday I visited only one talk, it was Meike’s one – a very nice talk. :-)
On sunday I had my own talk, about “Erfolgreiche OpenSource Projekt-Maintenance” (successfull opensource project maintenance). My slides (PDF) are available online (german only, sorry).
Posted in Computer, Debian, English, Events | Comments Off on Chemnitzer Linuxdays 2007: done
March 8th, 2007
Am 19. Mai 2007 ist es soweit: die Grazer LinuxTage 2007 finden statt.
Call for Lectures ist freigeschalten. Wer also einen Vortrag oder Workshop halten möchte, möge diesen bitte anmelden.
Posted in Computer, Events, Links | Comments Off on Call for Lectures – Grazer LinuxTage 2007
March 8th, 2007
Hmpf, I’m finding bugs in those days… Just to give you an idea what’s going on:
- XFS on the arm-architecture might be broken when using a filesystem created on x86 (still investigating on that)
- kvm of kernel 2.6.20 does not work together with kvm utils version 14 (known upstream, anyway – freeeeeeezing one of my boxes)
- #413911, #413913, #413914, #413916 – binary packages shipping VCS files
- #413698 – aptitude: package does not ship any language files
- #413920 – xine-check is broken
- #401916 – initramfs (still requires my attention)
Murphy, you suck.
Posted in Computer, English, Rants | 1 Comment »
February 28th, 2007
Vortragender: Andreas Zeller
Saarland University
http://www.st.cs.uni-sb.de/zeller/

Vortragstitel: "Die Fehler von Microsoft"

Zeit: Donnerstag, 1. März 2007, 16 c.t.

Ort: Hörsaal i11, Inffeldgasse 16b

Zusammenfassung:
Was sorgt dafür, dass Programme fehlschlagen?
Wir haben die Fehlerdatenbanken von Microsoft
durchforstet -- und untersucht, welche
Programmeigenschaften mit Fehlern korrelieren.
Hieraus lassen sich Modelle bilden, die die
fehlerträchtigen Module eines Projektes früh
und sicher identifizieren. Fallstudien an
bekannten Microsoft-Produkten sowie der
Open-Source-Projekte Eclipse und Mozilla
demonstrieren die Vorhersagekraft des Ansatzes.

CV:
Andreas Zeller ist Professor für Softwaretechnik
an der Universität des Saarlandes;  er erforscht
dort Verfahren zur automatischen Fehlerdiagnose
sowie zur Analyse von Software-Archiven.  Sein Buch
"Why Programs Fail" wurde 2006 mit einem Software
Development Productivity Award ausgezeichnet.
Quelle: Newsgroups der TU Graz .
Posted in Computer, Events | 3 Comments »
February 28th, 2007
Otti lädt zum Hackerkochen, am 05.03.2007 ab 18 Uhr im Medienkunstlabor
in Graz. Was das ist und weitere Details sind der Einladung zu Entnehmen.
Posted in Computer, Events, General, Links | Comments Off on Hackerkochen in Graz
February 28th, 2007
The countdown is running… On 3rd and 4th of March 2007 the Chemnitzer Linux Days will take place.
We’ll present grml (Linux Live-CD for sysadmins / texttool-users / geeks) at a booth there! If everything works as intented we will have a demo system as well as CDs of a special grml release named “Dioptrienotto @ clt07”:
Several grml developers will be there and I’m looking forward to meet formorer for the first time in RL. 8-)
Hope to see you there! :-)
Posted in Computer, Debian, English, Events, Links | Comments Off on grml @ Chemnitzer Linux Days 2007
February 26th, 2007
javascript: document.body.contentEditable = 'true'; document.designMode = 'on'; void 0
Visit any web page, clear the address bar and paste the above line into it. Press return and edit the webpage as you like. :) Works at least in Firefox, Internet Explorer and Opera.
BTW: I hope all of you know Firebug. (Opera will bring a similar feature known as Developer Console with version 9.20.)
Posted in Computer, English, Links | 2 Comments »
February 26th, 2007
Seufz. Gegeben ist ein Windows Vista Home Premium wie es auf Komplettrechnern typischerweise ausgeliefert wird. Der vordefinierte automatische Login ist nicht gewollt und Benutzerkonten wurden manuell hinzugefügt, trotzdem wird man mit dem Default-Benutzer beim Booten automatisch (ohne Passwort-Abfrage) eingeloggt. Müsste doch eine Kleinigkeit sein, das im Benutzerkonten-Dialog der Systemsteuerung umzustellen, oder? Denkste…. da ist nichts zu finden. Na dann schauen wir halt mal in das Benutzer-Snap-In der mmc (Microsoft Management Console). Nix da – ‘Auf diesem Computer wird Windows Vista Home Premium ausgeführt. Dieses Snap-In kann mit dieser Windows-Version nicht verwendet werden. Verwenden Sie die Option “Benutzerkonten” in der Systemsteuerung, um lokale Benutzerkonten auf diesem Computer zu verwalten.’ Argl! Die super-intuitive offizielle Lösung um an den ‘Erweiterte Benutzerkonten’-Dialog zu kommen:
Start -> Ausführen -> netplwiz -> '[x] Strg+Alt+Entf drücken ist für die Anmeldung erforderlich'
Zum Glück funktioniert wenigstens der von früheren Windows-Versionen bekannte Weg via ‘control userpasswords2’ noch…
Posted in Computer, Rants | Comments Off on Vista: Benutzer [nicht] automatisch anmelden
February 26th, 2007
A problem everyone stumbles across (at least) once:
% tar zcf stats_2005.tar.gz stats_2005*
zsh: argument list too long: tar
The reason? Too many files for the ARG_MAX limit. ARG_MAX defines the maximum length of arguments to the exec function (more precise: bytes of args plus environment for exec), defined in /usr/include/linux/limits.h on your Linux system:
% ls -la | grep -c stats_2005
9037
% getconf ARG_MAX
131072
% cpp << EOF | tail -1
#include <limits.h>
ARG_MAX
EOF
131072
%
Ok. But how to work around the issue? Possible solution for GNU:
% find . -name 'stats_2005*' > filelist
% tar zcf stats_2005.tar.gz --files-from filelist
Without the temporary file (filelist in our example):
% find . -name 'stats_2005*' -print | tar zcf stats_2005.tar.gz --files-from -
zsh provides zargs (but AFAIK it doesn’t work with gzip in the same command line due to the way zargs works, so create the archive in one step and compress it in another step later):
% autoload zargs
% zargs -- stats_2005* -- tar --ignore-failed-read -rpf stats_2005.tar
The approach works with other tools than tar as well of course, usage example for afio:
find . -name 'stats_2005*' -print | afio -o -Z stats_2005.afio
Depending on the type of problem (rm, cp, mv,…) you can choose differented approaches as well, some further examples:
% for file in stats_2005* ; do rm -f -- "$file" ; done
% perl -e 'unlink <stats_2005*>'
% zsh -c 'zmodload zsh/files && rm -f -- stats_2005*'
% zsh -c 'autoload -U zargs; zargs -r ./stats_2005* -- rm -f'
% ksh93 -c 'command -x rm -f -- stats_2005*'
% find . -maxdepth 1 -name 'stats_2005*' -print0 | xargs -r0 rm -f
% find . -name 'stats_2005*' -print0 | xargs -0 mv -i --target-dir=/destination
% zmodload zsh/files ; mv -- stats_2005* /destination
Posted in Computer, Debian, English | 2 Comments »
February 24th, 2007
Ever wanted to insert a character in your terminal but don’t have a keybinding for that character? zsh provides a nifty feature called insert-unicode-char:
autoload insert-unicode-char
zle -N insert-unicode-char
bindkey '^Xi' insert-unicode-char
Figure out the character’s code (take a look at unicode.org/charts/ for example) and press ‘ctrl-x i’, followed by the character’s code and press ‘ctrl-x i’ once more. Usage example: ‘ctrl-x i 00A7 ctrl-x i’ will give you an ‘§’.
Posted in Computer, Debian, English | 4 Comments »
February 23rd, 2007

Bisher hatte ich nur mit Pre-Builds von Windows Vista zu tun (im Speziellen wegen meinem Trusted Computing-Seminarprojekt auf der Uni), dieser Tage hab ich mir einmal die endgültige Version von Microsoft Windows Vista Business Edition (Build 6000) ein wenig angeschaut. Als Referenz für mich selbst mal ein kurzer Braindump und ein paar URLs.
Positiv zu erwähnen ist, dass die Installation rasch (~20-30 Minuten) und mit nur wenigen Fragen von der Hand geht. Das Look’n’Feel ist insgesamt OK (wirkt ein bisschen wie ein Konglomerat aus Linux und Mac OS), der Default ist zumindest besser als unter Windows XP (was aber halt kein Kunststück ist). Die Windows-Firewall (‘mmc WF.msc’) hat dazugelernt: feinere Einstellmöglichkeiten und nun auch die Möglichkeit Outgoing zu filtern.
Natürlich gibt es auch wieder einiges Negatives zu vermelden: der MBR wird noch immer ohne Rückfrage und ohne Rücksicht auf Verluste überschrieben. Eine Installation auf externer USB- oder Firewire-Festplatte ist nach wie vor nicht möglich (welches Jahr schreiben wir doch noch mal?), die High Definition Audio Soundkarte wurde gar nicht erst erkannt (hallo?). Bitlocker (Laufwerksverschlüsselung) gibt es leider nur in der Ultimate-Edition *grml*. Virtuelle Desktops gibt es leider nach wie vor nicht out-of-the-box. Mit DRM soll die Profitsicherheit der Medienindustrie auf Kosten der Rechenleistung und des Benutzers gewährleistet werden, während für die Sicherheit des Benutzers nur wenig Verbesserung in Aussicht ist. Die UAC-Popups (User Account Control) – der Default-User ist ja nach wie vor automatisch Mitglied der Gruppe Administratoren – sind derart präsent, dass der Grossteil der Benutzer wohl per Reflex einfach auf ‘Allow’ klickt oder UAC generell abstellt. Zum Beispiel ist der Internet Explorer mit Flash-Plugin und aktivierter UAC auf Dauer nicht zum Aushalten. Ein Windows Update erfordert typischerweise nach wie vor einen Reboot.
Was ich mir noch anschauen möchte: Vista bringt iSCSI-Software schon von Haus aus mit, iscsicli (iSCSI discovery tool) und iscsicpl (iSCSI initiator discovery tool). Nachdem iSCSI auch von grml unterstützt wird und das bei mir schon seit Langem auf der Todo-Liste steht, werde ich da wohl mal ein bisschen was machen müssen. :)
Es stecken natürlich noch weitere Neuigkeiten unter der Haube. Ein verbesserter Suchdialog, neue Backupmöglichkeiten, der Internet Explorer hat Features gelernt, die andere Browser schon seit Ewigkeiten können,… Ich hab eine kleine Roadshow an Screenshots online gestellt. Wie gut sich das alles in der Praxis bewähren kann, wird sich natürlich erst zeigen…
Nice-to-have Software:
Security-mäßig:
Unsortiertes:
Posted in Computer, Links, Rants | 1 Comment »
February 11th, 2007

In Dr. House spielt Hugh Laurie als Dr. Gregory House einen Schmerzmittel-süchtigen und "ruppigen", aber fachlich umso kompetenteren Arzt in der Abteilung für diagnostische Medizin in einem Krankenhaus in New Jersey. Ich steh auf den Humor und freue mich schon auf die 2. Staffel. Wer die Serie noch nicht kennt sollte einen Blick auf Dr. House @ wikiquote und die Video-Ausschnitte bei youtube werfen. Informationen zu Dr. House im Fernsehprogramm gibt’s bei serienjunkies.de. Auch wenn die DVD-Specials im Vergleich zu anderen DVDs vielleicht ein bisschen kurz und knapp ausfallen – momentan meine absolute Lieblingsserie.
Posted in Allgemein, Bücher & CO, Links | 2 Comments »
February 10th, 2007

I’ve the Asus WL-500G Premium access point since more than 2 month at home. I bought it for being able to play with OpenWrt without touching my productive setup. Now I finally found the time to install OpenWrt on it. There’s documentation available in the openwrt-wiki, but again JFTR (for myself) I document the relevant steps.
Downloaded openwrt-brcm-2.4-jffs2-4MB.trx [md5: c11b1b3b16a804aa3a190413f69a7510] (cause it works, thanks mabu) and uploaded the firmware image via tftp:
% tftp 192.168.1.1
binary
rexmt 1
timeout 60
trace
put openwrt-brcm-2.4-jffs2-4MB.trx
After waiting a few minutes and another reboot I could access the webinterface. Setting the password failed in the first try and needed another reboot (known problem). Accessing the interface via ssh works then:
root@OpenWrt:~# uname -a
Linux OpenWrt 2.4.30 #1 Sun Mar 26 19:02:04 CEST 2006 mips unknown
root@OpenWrt:~# free
              total         used         free       shared      buffers
  Mem:        14348         8280         6068            0            0
 Swap:            0            0            0
Total:        14348         8280         6068
root@OpenWrt:~# nvram
usage: nvram [get name] [set name=value] [unset name] [show]
root@OpenWrt:~# nvram get vlan1ports
0 5u
root@OpenWrt:~# nvram get wan_ifname
eth0
root@OpenWrt:~# nvram get lan_ifnames
vlan0 eth1
root@OpenWrt:~# nvram get lan_ifname
br0
root@OpenWrt:~# nvram get sdram_init
0x000b
root@OpenWrt:~# nvram get sdram_ncdl
0x309
root@OpenWrt:~# nvram set sdram_init=0x0009
root@OpenWrt:~# nvram set sdram_ncdl=0
root@OpenWrt:~# nvram commit
root@OpenWrt:~# reboot
[...]
root@OpenWrt:~# free
              total         used         free       shared      buffers
  Mem:        30556         7488        23068            0            0
 Swap:            0            0            0
Total:        30556         7488        23068
root@OpenWrt:~#
Now I’ll play around with OpenWrt. If you have suggestions for other firmware versions/variants that work as well and are worth a look please let me know. :)
Posted in Computer, English, Hardware | Comments Off on OpenWRT on Asus WL-500G Premium
February 9th, 2007
Virtualisierung ist ja in aller Munde. Xen, UML, vserver,… (einen schönen Überblick gibt es übrigens auf kernelnewbies.org). KVM (Kernel-based Virtual Machine) hat mit Kernel 2.6.20 Einzug in den Mainline-Linuxkernel gefunden und wer eine CPU mit VT-Support hat, kann das voll auskosten.
grml 0.9 bringt das Kernelmodul für kvm übrigens schon mit. Um das also mal auszuprobieren, muss man auf grml einfach nur folgendes ausführen:
apt-get update ; apt-get install kvm
modprobe kvm
kvm -cdrom $ISO
"$ISO" ersetzt man mit einem bootfähigen ISO. Für eine kurze Demo kann ich das nicht mal 4MB kleine ttylinux empfehlen, also einfach folgendes ausführen:
wget http://www.minimalinux.org/ttylinux/packages/bootcd-i386-5.3.iso.gz
gzip -d bootcd-i386-5.3.iso
Aja, kvm funktioniert auch ohne VT-Support seitens der CPU, dann läuft es halt einfach ohne Hardware-Beschleunigung. :-)
Posted in Computer, Links | 2 Comments »
February 9th, 2007
# cfdisk /dev/sda

FATAL ERROR: Bad primary partition 0: Partition ends in the final partial cylinder
Huh?!
# sfdisk -d /dev/sda
# partition table of /dev/sda
unit: sectors

/dev/sda1 : start=       63, size=  2015168, Id= 6, bootable
/dev/sda2 : start=        0, size=        0, Id= 0
/dev/sda3 : start=        0, size=        0, Id= 0
/dev/sda4 : start=        0, size=        0, Id= 0

# fdisk -l /dev/sda

Disk /dev/sda: 1031 MB, 1031798272 bytes
255 heads, 63 sectors/track, 125 cylinders
Units = cylinders of 16065 * 512 = 8225280 bytes

   Device Boot      Start         End      Blocks   Id  System
/dev/sda1   *           1         126     1007584    6  FAT16
Partition 1 has different physical/logical endings:
     phys=(124, 254, 63) logical=(125, 112, 50)
Tsss…. Eine Behandlung mit fdisk hilft natürlich, aber das ist wohl die Strafe, wenn man USB-Sticks bei Peluga holt. (Disclaimer: ich war grad in der Nähe und hab Ersatz für meinen im NSLU2 verbauten gebraucht.)
Posted in Computer, Hardware, Rants | Comments Off on Ein stinkender USB-Stick


